If you've ever dealt with stiff laundry, spotty dishes, or stubborn soap scum, a simple water hardness test is your first practical step. This quick check tells you exactly how much dissolved mineral content—mostly calcium and magnesium—is flowing through your pipes. The results provide clear, actionable insights, explaining if these minerals are the real culprit behind your frustrating home maintenance issues.
Why Hard Water Is a Bigger Deal Than You Think
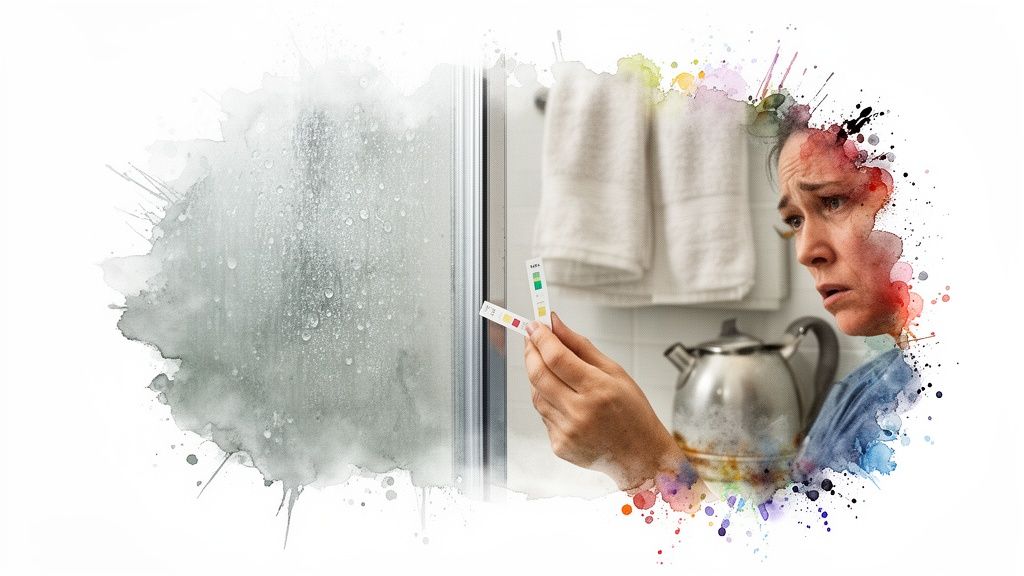
That chalky film on your shower door or the constant struggle with dry, itchy skin? They're more than just minor annoyances. They’re the classic calling cards of hard water, caused by high levels of dissolved minerals that can slowly but surely damage your plumbing, appliances, and even your hair and skin.
This isn't a rare problem. In fact, over 85% of American homes deal with hard water, making testing a critical step for homeowners everywhere, including here in Los Angeles. Data from the USGS shows that nearly half of all U.S. water stations report hardness levels over 120 mg/L, putting them squarely in the 'hard' or 'very hard' categories. If you're curious about the scale of the issue, you can dig into the findings on hard water across the country.
The Real-World Impact of Mineral Buildup
Ignoring hard water doesn't make the problem go away—it just leads to bigger, more expensive headaches down the road. That mineral buildup, better known as limescale, quietly accumulates inside your pipes and appliances, creating a domino effect of problems that hit your wallet and your daily comfort.
Here’s a clear look at what that means for your home:
- Worn-Out Appliances: Your water heater is one of the first victims. It has to burn more energy just to heat water through layers of limescale, driving up your utility bills and leading to a much shorter lifespan.
- Weak Soap and Detergent: Ever feel like you need more and more soap to get a good lather? Hard water minerals are to blame. They react with soaps and detergents, reducing their effectiveness and leaving behind a sticky film on your skin and dishes.
- Dull, Scratchy Laundry: Those same minerals embed themselves in the fibers of your clothes during the wash cycle. The result? Fabrics that feel rough and colors that look faded and worn out long before they should.
- Endless Cleaning: See those crusty white deposits on your faucets and showerheads? That’s limescale. It forces you to spend more time scrubbing with harsh chemicals just to keep things looking clean.
The Value of Testing: A water hardness test isn't just for curiosity. It’s a smart diagnostic tool that provides the information you need to protect your home’s most important systems—your plumbing and appliances—from failing early, saving you money on repairs and replacements.
Knowing your numbers is the first step toward finding the right solution. To help you make sense of your test results, we've put together a quick guide that breaks down the common water hardness levels. It connects the technical measurements to the everyday signs you're probably already seeing.
Understanding Water Hardness Levels at a Glance
This straightforward table breaks down the standard water hardness classifications, helping you quickly understand where your water might fall and what to expect at each level.
| Classification | Hardness in Grains per Gallon (GPG) | Hardness in Milligrams per Liter (mg/L) | Common Signs You'll Notice |
|---|---|---|---|
| Soft | 0 – 1.0 | 0 – 17.1 | Excellent lather with soap; no spots on dishes. |
| Slightly Hard | 1.1 – 3.5 | 17.2 – 60 | Faint spots on glassware; minor soap scum buildup over time. |
| Moderately Hard | 3.6 – 7.0 | 61 – 120 | Noticeable spots and film; laundry feels a bit stiff. |
| Hard | 7.1 – 10.5 | 121 – 180 | Visible limescale on fixtures; dull clothes; dry skin. |
| Very Hard | Over 10.5 | Over 180 | Heavy scale buildup; frequent appliance repairs; high soap usage. |
Once you see your results on this chart, you'll have a much clearer picture of what's happening in your home and can start exploring effective, long-term solutions.
Choosing the Right Water Hardness Test Method
So, you suspect you have hard water. What now? The next step is figuring out just how hard it is, and for that, you need to test it. There isn't a single "best" way to do this; the right method depends on your specific goal.
You have three main paths you can take, each offering a different balance of accuracy, cost, and convenience. The test you choose should match your situation, whether you're a homeowner trying to solve a cloudy glassware problem or a business owner protecting thousands of dollars in equipment.
The Quick Screening: DIY Test Strips
For a fast, ballpark estimate, nothing beats simple DIY test strips. You can find these at any hardware store or online, and they're incredibly easy to use. Just dip a strip into a sample of your water for a couple of seconds, pull it out, and watch it change color. Then, you match that color to the chart on the package.
This is the perfect first step if you're just starting to connect the dots. Maybe you've noticed stubborn soap scum in the shower or your laundry feels stiff, and you just want a quick confirmation before you dig any deeper.
- Best For: Homeowners who need a quick, low-cost screening.
- Accuracy: Good for a general idea, but don't be surprised if it's off by a grain or two.
- Convenience: You get an answer in less than a minute, right in your own kitchen.
Practical Example: A family moves into a new rental and immediately notices their glasses come out of the dishwasher looking foggy. They grab a pack of test strips for under $15 and get a result in the "very hard" range. This simple test gives them the data they need to start a conversation with their landlord about installing a water softener.
The More Precise Method: Titration (Drop) Kits
If you need a more reliable number to make a decision, a titration kit is a huge step up in accuracy. You might see these called "drop test kits." The process involves adding a chemical reagent, one drop at a time, into a small, measured water sample. You keep adding drops until the water suddenly changes color. The number of drops it took to make that happen tells you your water hardness level.
This approach takes a lot of the guesswork out of the equation. You aren't just trying to match shades of green; you're getting a specific number. It's a fantastic middle-ground option, giving you much better precision without the time and expense of a full lab analysis.
Actionable Insight: A titration kit is the smart move if you're actively shopping for a water softener. Knowing your water hardness is 12 GPG (grains per gallon) versus just "hard" is critical. It helps you choose a system with the right grain capacity, which means it will run efficiently without wasting unnecessary salt and water. If you need help with this, our guide on finding the best water treatment systems can walk you through the options.
The Definitive Answer: Professional Lab Analysis
When you need absolute certainty, there's no substitute for sending a sample to a professional laboratory. This is the gold standard. You'll receive a detailed report covering not just mineral content but also pH levels and other potential contaminants lurking in your water.
This is the only real option for most commercial applications or for homeowners on a private well who need a complete picture of their water quality for health and safety reasons. The report a lab provides is legally defensible, which can be critical for business compliance or property management.
- Best For: Businesses, well water users, and anyone needing verifiable data.
- Accuracy: Delivers exact measurements of minerals and contaminants.
- Convenience: Involves collecting a sample and mailing it in, with results usually taking a few days to a week.
Practical Example: A Los Angeles coffee shop owner is about to install a brand-new, high-end espresso machine. They know that limescale from the city's hard water could destroy the machine's sensitive internal parts. They wisely opt for a lab test. The results give them a precise hardness reading, allowing them to install a commercial-grade softener and filtration system perfectly calibrated to protect their $20,000 investment and, just as importantly, ensure every cup of coffee is consistent.
Ultimately, the right method comes down to your needs. For a quick check-in, strips are fine. For making an informed purchase, a titration kit is much better. And for commercial-grade certainty, a lab analysis is the only way to go.
Getting an Accurate Water Hardness Reading at Home
You've picked your testing method, so what's next? Getting a reliable result. It’s a simple process, but a few small details can be the difference between a vague guess and a hard number you can actually use to make decisions. The goal here is to get a true snapshot of the water coming into your home, not just what's been sitting in your pipes overnight.
We'll walk through the two most popular DIY options: test strips and titration kits. They work differently, but the most crucial part is the same for both—how you collect the water. Get this right, and you're well on your way to an accurate test.
First things first, always test your cold water. Hot water heaters can sometimes throw off the mineral content. Head to a faucet you use often, like the kitchen sink, and let the cold water run for at least 30 seconds. This flushes out any standing water and pulls a fresh sample straight from your main water line.
This flowchart lays out the three main ways you can test your water, from a quick check with strips to a full professional lab analysis.
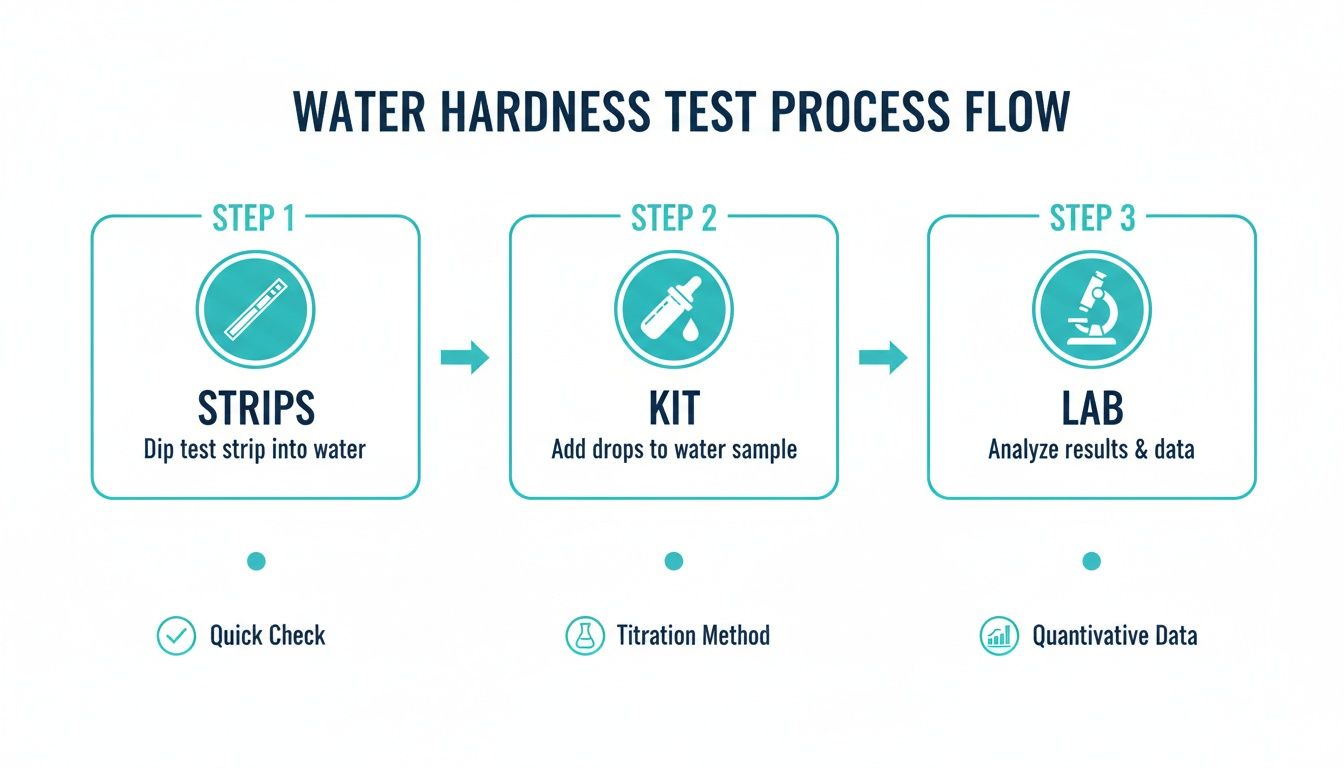
As you can see, the methods build on each other. Strips give you a ballpark estimate, while kits and lab work deliver the kind of precision you need for bigger decisions.
Mastering the Test Strip Method
Water hardness test strips are by far the fastest way to get an answer. They’re designed for pure simplicity, giving you a result in less than a minute. Once you have your fresh water sample in a clean glass, it's just a matter of paying close attention to the color chart.
Here are the clear steps to follow:
- A Quick Dip: Submerge the reactive end of the strip into your water sample for just a second or two. Don't let it soak—that’s all it takes.
- No Shaking: Once you pull the strip out, fight the urge to shake off the extra water. Shaking can make the color pads bleed into each other and smudge your result.
- Read It Fast: Check the instructions, but most strips need to be read within 15 to 30 seconds. Compare the strip to the color chart on the package right away. If you wait too long, the colors can keep developing and give you a false high reading.
A common mistake is misreading the color chart. Good lighting is everything. Take the strip and the chart over to a window with natural light to make sure you're getting an accurate color match.
Practical Example: A homeowner in Los Angeles used a test strip that showed a color somewhere between 10 and 15 GPG. Instead of guessing, he ran a second test. This time, the color was a clear match for the 15 GPG block, confirming his water was "very hard." That solid number gave him the confidence to invest in a high-capacity water softener that was right for his home.
Getting Precise Results with a Titration Kit
If you want a more exact number, a titration kit (sometimes called a "drop test") is your best bet for a DIY option. It feels a bit more like a chemistry experiment, but it completely removes the subjective color-matching of test strips. This is the way to go when you need a specific hardness number, especially if you're programming a new water softener.
The whole process boils down to adding a chemical reagent, drop by drop, into a measured water sample until it changes color. The number of drops it takes is your hardness level.
Key Steps for a Titration Test
- Measure It Perfectly: The kit will have a small vial with a fill line. It's critical to fill it precisely to that line. Too much or too little water will throw off your entire result.
- Add Drops with Care: Hold the reagent bottle completely vertical over the vial. This ensures every drop is the same size. Add one drop at a time, swirling the vial gently after each one to mix it in.
- Watch for the Flip: The water will usually start out red or pink. Keep adding drops and swirling until it abruptly changes color—often to blue or green. That final drop, the one that causes the change, is the one you're looking for.
Count up the total number of drops you used. That's your water hardness in Grains per Gallon (GPG). So, if it took 11 drops for the water to turn from red to blue, your water hardness is 11 GPG. Having that kind of precision is invaluable when you're investing in a water treatment system because you can calibrate it perfectly from day one.
So, You Have a Number. What Does It Actually Mean?
Getting a result from your water hardness test is the easy part. Now, we need to translate that number into what it means for your home, your appliances, and your wallet. A test result isn't just data; it's a diagnosis. Understanding the real-world impact is the key to making a smart decision and realizing the value of treatment.
Whether your test strip turned a certain shade of green or your titration kit required a specific number of drops, your result is now a number. Let’s make sense of it.
Grains Per Gallon Versus Parts Per Million
You’ll almost always see water hardness measured in one of two units: Grains per Gallon (GPG) or Parts Per Million (PPM).
For all practical purposes, PPM is the same as Milligrams per Liter (mg/L). In the water treatment industry, especially in the U.S., GPG is the standard. Think of it like using inches and feet—it’s just how we talk about hardness. PPM, on the other hand, is a more universal, metric-based unit.
The good news is that converting between them is simple: 1 GPG = 17.1 PPM.
Actionable Insight: If your city’s water report says you have 171 PPM of hardness, divide by 17.1 to get 10 GPG. This simple math ensures you're speaking the same language as any water treatment pro and helps you properly size equipment like a water softener, preventing you from buying a system that's too small and will wear out quickly.
What Your Hardness Number Tells You About Your Home
That number—say, 10 GPG—tells a story about what’s happening inside your pipes, your water heater, and even on your skin. It’s not just an abstract figure; it has direct consequences.
Let's stick with that 10 GPG example, which is solidly in the "Hard" water category. Here’s a glimpse of what’s going on:
Your water heater is fighting a losing battle. For every 5 GPG of hardness, a water heater can lose up to 4% of its efficiency from scale buildup. At 10 GPG, you’re already looking at a significant performance drop, which means higher energy bills every single month.
You're wasting soap and money. Those dissolved rock minerals bind with soap molecules, preventing them from lathering properly. You end up using more laundry detergent, more dish soap, and more shampoo just to get things clean.
Your fixtures are getting crusty. That white, chalky residue on your faucets and showerheads? That’s limescale. At 10 GPG, it builds up fast, turning cleaning into a constant chore and eventually choking off water flow.
This is exactly why the official classifications matter. They give us clear benchmarks for when it’s time to stop cleaning the symptoms and start treating the source.
Interpreting Your Hardness Test Results
This simple chart will help you understand what your GPG or PPM reading means for your home or business, and what level of action is typically recommended.
| Hardness Level (GPG) | Hardness Level (PPM / mg/L) | Typical Impact on Your Property | Recommended Action Level |
|---|---|---|---|
| 0 – 3.5 | 0 – 60 | Minimal impact. You'll see little to no scale buildup. | Monitor: No immediate action is needed. |
| 3.6 – 7.0 | 61 – 120 | Moderately Hard. Faint spots on dishes and some soap scum appear. | Consider: A water conditioner or softener is beneficial. |
| 7.1 – 10.5 | 121 – 180 | Hard. Visible limescale on fixtures, stiff laundry, and dry skin are common. | Recommended: A water softener is strongly advised. |
| Over 10.5 | Over 180 | Very Hard. Significant scale buildup clogs pipes and damages appliances. | Essential: A high-capacity softener is necessary to protect your home. |
By using this framework to interpret your water hardness test, you're no longer just looking at a number. You now have a clear roadmap. You know exactly where you stand and what you need to do to protect your home and improve your water for good.
So, Your Water Is Hard. Now What?
You've got your test results, which means you've officially moved past the "what's wrong with my water?" phase. Now, it's time to find the right solution. That little number—your exact water hardness level—is the most important piece of the puzzle. It's what allows you to choose an effective, long-term fix that protects your home and appliances from the relentless damage of mineral buildup.
The right system doesn't just get rid of limescale and soap scum; it genuinely makes daily life better, offering significant value.
Ion-Exchange Water Softeners: The Go-To Solution
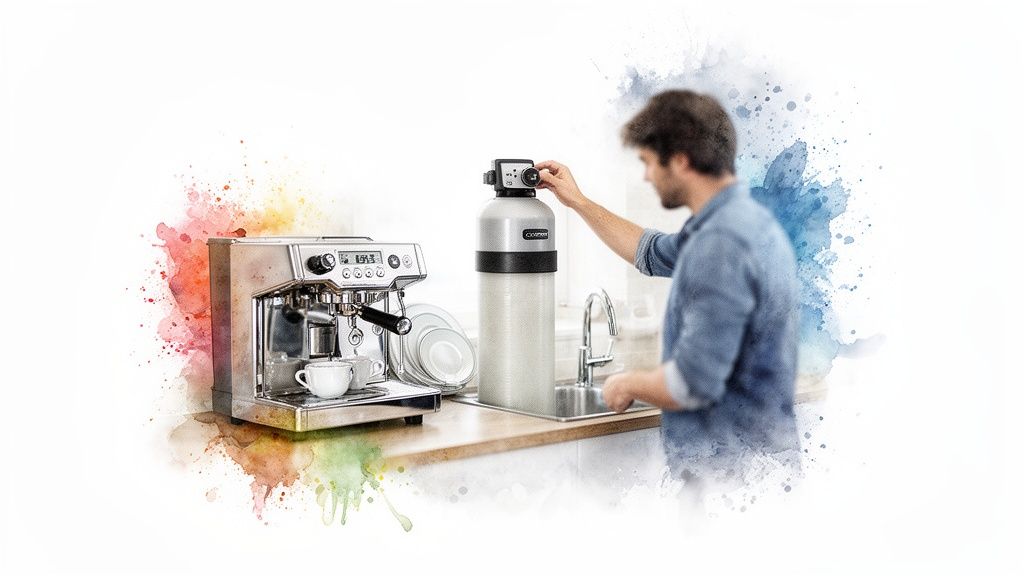
For most homes with moderately hard to very hard water (think anything over 7 GPG), the workhorse solution is an ion-exchange water softener. This isn't just a filter; it's the only technology that truly removes the minerals responsible for hardness—calcium and magnesium.
It works like a mineral magnet. Water flows through a tank filled with tiny resin beads that grab onto the hardness ions and swap them out for sodium ions. The result? Genuinely soft water that lathers up beautifully, keeps your appliances safe, and leaves your skin feeling much smoother. If you're ready to explore options, our guide on how to choose a water softener breaks down all the different sizes and features you'll encounter.
Real-World Scenarios: Finding the Right Fit
There’s no "one-size-fits-all" answer when it comes to water treatment. The best system is always the one that solves your specific problems.
Here are a couple of practical examples:
A Family with Sensitive Skin: A household in Los Angeles is struggling with eczema and constantly dry skin. A quick test shows their water is 14 GPG—very hard. For them, a whole-home ion-exchange softener is a game-changer. It means every tap, from the shower to the laundry, delivers soft water. This provides immediate relief for their skin and stops irritating mineral residue from building up in their clothes.
A Local Coffee Shop: A cafe owner invests in a high-end espresso machine and wants to protect it while perfecting their coffee. Their water comes in at 11 GPG. They need a two-pronged approach. First, a commercial-grade water softener to eliminate scale and protect the machine's delicate heating elements. Second, a reverse osmosis (RO) system for their brewing water. This setup removes the damaging minerals and then purifies the water for a perfectly balanced, delicious cup of coffee.
Water hardness isn't the same everywhere. Far from it. In Perth, Australia, hardness can swing from a soft 29 ppm to a very hard 226 ppm. Here in the U.S., many areas have water over 180 mg/L, which can corrode pipes four times faster than soft water. At Praz, we tackle this head-on with free on-site tests to figure out exactly what you're dealing with, then match you with a system proven to reduce hardness by up to 95%.
What About Other Filtration Systems?
This question comes up a lot: "Can't I just use a regular filter?" While systems like reverse osmosis are fantastic for purifying drinking water—they remove a huge range of contaminants—they aren't built to handle the sheer volume of minerals in hard water. Pushing hard water through an RO system is a quick way to clog and destroy its sensitive membrane.
That's why you often see RO systems and water softeners working together. The softener does the heavy lifting by removing the hardness minerals first. Then, the RO system polishes the now-softened water, creating the ultimate purification duo for pristine drinking water. Once your water is soft, another crucial step is finding the best descaler for coffee machine to eliminate any existing limescale. By tackling the problem from every angle, you ensure every part of your water system, from the pipes to your morning coffee, is protected.
Common Questions About Water Hardness Testing
You’ve got your test results, but now what? It's completely normal to have a few questions about what the numbers mean and what you should do next. Let's clear up some of the most common questions we get from homeowners and businesses.
My goal here is to help you connect the dots, so you can move forward feeling confident about your water quality decisions.
How Often Should I Re-Test My Water?
This is a great question, and the answer really comes down to where your water comes from.
If you're on a city or municipal water supply, you can usually test once and be done with it. Public water systems are highly regulated and the mineral content stays pretty consistent. You'd really only need to test again if you suddenly notice new signs of hardness, like chalky buildup reappearing on your faucets.
Now, if you have a private well, that's a different story. Groundwater is dynamic and can be affected by everything from a heavy rainy season to nearby construction. For well owners, an annual water hardness test is a smart move. It helps you stay on top of any changes. For businesses where water quality is a bottom-line issue—think coffee shops, car washes, or labs—we recommend testing every six months to protect your equipment and maintain consistency.
Will a Standard Water Filter Pitcher Help With Hardness?
It's a common hope, but unfortunately, that pitcher filter in your fridge won't touch water hardness.
Those simple carbon filters are fantastic for improving taste and smell by pulling out things like chlorine. But they're not designed to remove the dissolved minerals—calcium and magnesium—that actually cause hardness. To tackle hardness, you need a system specifically built for it, like a water softener that uses an ion-exchange process to capture and remove those minerals.
Is Hard Water Unsafe to Drink?
Let's put this one to rest: hard water is not a health risk. The minerals responsible for it, calcium and magnesium, are actually nutrients our bodies use every day.
The trouble with hard water is purely mechanical and cosmetic. It’s a problem for your house, not your health. The real damage is the scale buildup that clogs pipes, shortens the life of your water heater, and suffocates your appliances. On top of that, you've got the daily annoyances—spotty dishes, stiff laundry, and that dry, itchy feeling on your skin and hair.
The Bottom Line: Hard water is perfectly safe to drink, but it can be incredibly expensive for your home. Choosing to soften your water is about protecting your investment and making daily life more pleasant, not about health.
Does a Water Softener Make Water Salty?
This is easily the biggest misconception about water softeners. When a softener is working correctly, it adds a miniscule amount of sodium to the water—so little that most people can't taste it. To put it in perspective, a glass of softened water often has less sodium than a slice of bread.
If you do taste salt, that’s a red flag that something is wrong with the softener. It usually means there's a clog or a problem with the regeneration cycle that's causing brine to leak into your water lines. We've seen it happen, and it’s definitely something that needs a professional look. You can read more about what to do if your water tastes salty with a water softener and how to get it fixed.
Ready to finally solve your hard water headaches? Here at Praz Pure Water, Inc., we’ve spent over 20 years helping Los Angeles residents and businesses get the best water possible. We can come out for a free, on-site water assessment to figure out exactly what you need and recommend the right US-made system for your home. Give us a call or visit us online to schedule your consultation. https://prazpurewater.com