A solid water softener maintenance schedule is all about simple, repeatable tasks that deliver incredible value. Think of it as a quick check-in: glance at the salt levels monthly, give the brine tank a good clean-out quarterly, and book a professional inspection annually. This simple rhythm is your best defense against common headaches like salt bridging and resin fouling, ultimately saving you money and keeping your water consistently soft.
Why a Maintenance Schedule Is Your Best Defense Against Hard Water
Let's be real—life gets busy, and remembering to check on your water softener isn't always top of mind, especially when you're dealing with Los Angeles' notoriously hard water. But a little proactive care does more than just sidestep surprise breakdowns. It actually extends the life of your unit, keeps energy bills in check, and guarantees the soft water you invested in for your home or business.
Ignoring your system is a lot like skipping oil changes in your car. Sooner or later, a small, fixable issue morphs into a costly, inconvenient failure. The immediate value of a schedule is that you catch these small problems before they require an expensive emergency call.
Putting a simple schedule in place turns maintenance from a nagging chore into a quick, easy habit. The real magic is in the consistency. For example, a homeowner in Burbank noticed their new chrome fixtures were already getting water spots. A quick monthly check revealed their salt was running low faster than expected. Refilling it immediately solved the problem and protected their investment in new faucets. A few minutes of your time each month is far more effective than waiting for spotty dishes, stiff laundry, or that chalky scale buildup on your fixtures to tell you something's wrong.
The Power of Proactive Care
A well-maintained water softener is an efficient one. When the brine tank is clean and the resin bed is functioning properly, the system uses just the right amount of salt and water for each regeneration cycle. That efficiency translates directly into savings on your utility bills and salt costs.
The biggest win from a consistent maintenance schedule is simple: it protects your investment. By dedicating just a few minutes each month and an hour or two each year, you can potentially add another 5-10 years to your system's lifespan.
Take a typical Los Angeles home, for instance. Our water, often sourced from the Los Angeles Aqueduct, can have hardness levels hitting 15-20 grains per gallon. In areas like this, a strict schedule isn't just a good idea—it's essential. While many plumbers suggest a professional look-over every 12-18 months, bumping that up to an annual check-up is a smart play in a high-hardness city like ours.
This chart breaks down the essential tasks into a clear, manageable routine.
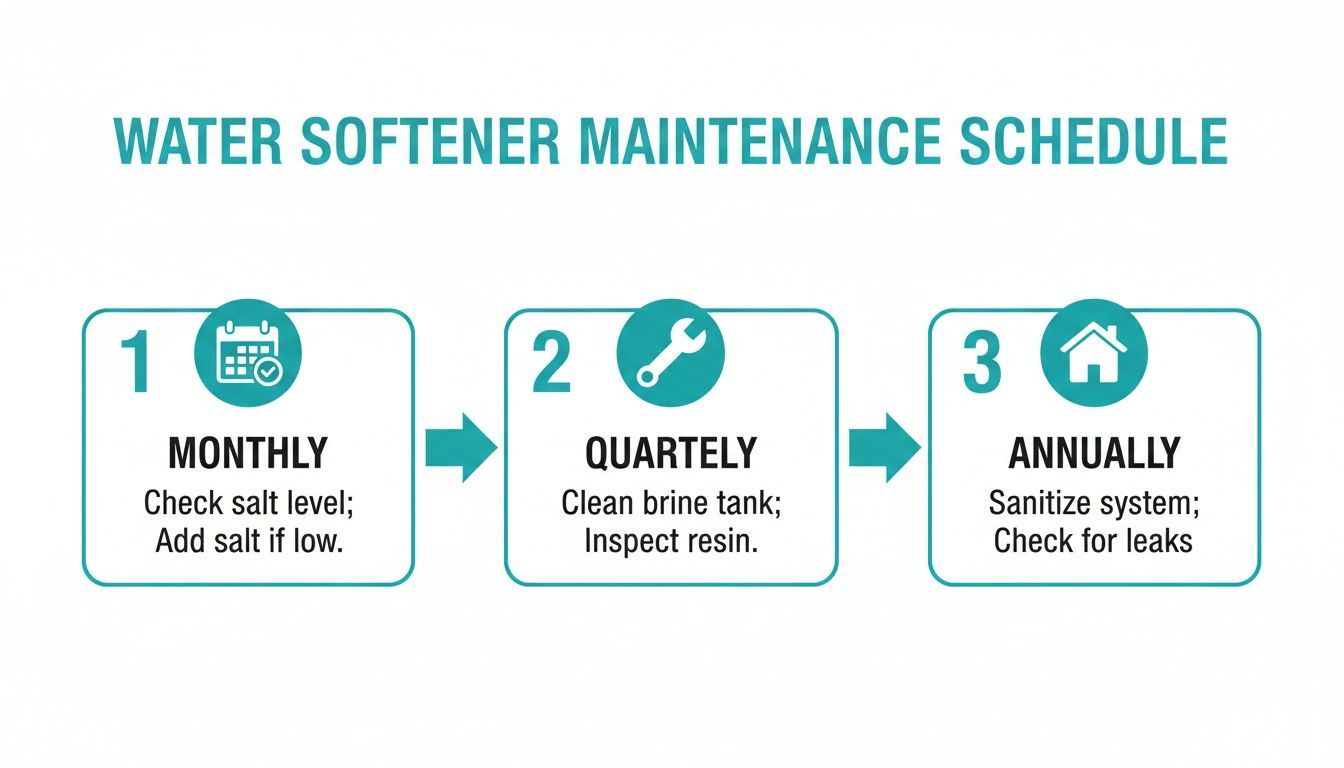
As you can see, the foundation is built on consistent monthly checks, with more in-depth tasks quarterly and annually to keep everything running perfectly.
To make things even easier, here’s a quick-glance checklist you can follow.
The Complete Water Softener Maintenance Checklist
| Frequency | Task | Key Benefit | Estimated Time |
|---|---|---|---|
| Monthly | Check Salt Levels | Prevents running out of salt & ensures consistent soft water. | 2 minutes |
| Quarterly | Clean Brine Tank | Stops salt bridges & mushing; removes sediment buildup. | 30-45 minutes |
| Annually | Professional Inspection | Catches potential issues early; cleans injectors & valves. | 1-1.5 hours |
| Every 5-10 Years | Resin Bed Replacement | Restores softening capacity to "like new" performance. | 1.5-2 hours |
This table serves as a handy reminder for what to do and when, so you can keep your system in prime condition without the guesswork.
Key Benefits of a Maintenance Routine
When you stick to a schedule, you ensure no critical task gets missed. The payoff is immediate and clear:
- Longer Equipment Lifespan: Regular cleanings and checks stop sediment and iron from building up, which can wear down internal parts and ruin the resin beads over time.
- Consistent Water Quality: You get to avoid that "Uh-oh, the water's hard again" moment because you caught a low salt level or a salt bridge before it became a problem.
- Lower Operating Costs: An efficient system is a thrifty one. It uses less salt and less water, which is good for your wallet and the environment.
Ultimately, a reliable maintenance plan for your whole house water softener system gives you one less thing to worry about. You can relax knowing your investment is working correctly to protect your plumbing, fixtures, and appliances from the damaging effects of scale.
Keeping Your Softener Running with Simple Weekly and Monthly Checks
The real secret to a water softener that runs for years without a hitch isn't some complicated annual tear-down. It's the simple, consistent checks you do every few weeks. Think of it as the routine maintenance that forms the foundation of a healthy system, letting you spot small issues before they ever turn into a no-soft-water emergency.
This is where you’ll get hands-on with the most common task: managing the salt in your brine tank. But doing this right involves more than just dumping in a new bag when you remember.
The Monthly Salt Check: Your Most Important Habit
Your main job each month is to pop the lid and check the salt level. A good rule of thumb is to always keep the brine tank at least half full. Don't fill it to the brim, though—that can cause its own problems. This simple habit makes sure the system has plenty of "fuel" for its regeneration cycles, so you never get stuck with hard water.
Actionable Insight: Set a recurring calendar reminder on your phone for the first of every month. Label it "Check Water Softener Salt." This two-minute task ensures you never forget and prevents the #1 cause of hard water problems.
Spotting and Breaking Up Salt Bridges
Sometimes, the tank looks full, but the softener isn't actually using any salt. This is usually the work of a salt bridge—a hard, solid crust of salt that forms near the top of the pile. This crust fools the system, preventing the loose salt underneath from ever dissolving into the water.
I remember a restaurant owner in Los Angeles who was about to replace his commercial dishwasher because his glasses were coming out with a chalky film. Turns out, the real culprit was a salt bridge in his water softener he never knew to check for.
A salt bridge creates an empty cavern between the crust and the water below. To find one, just give the side of the tank a few gentle taps with a rubber mallet. A dull thud at the bottom and a hollow echo up top is a dead giveaway.
Here’s how to safely break one:
- First, switch the unit to "bypass" to shut off the water flow.
- Grab a long, blunt tool—a broom handle works perfectly.
- Carefully push down on the center of the crust with steady, gentle pressure.
- The goal is to crack the bridge into smaller chunks that will fall into the water. Never use anything sharp, as you could easily puncture the tank.
Once the salt is broken up, you can switch the bypass valve back and let the system get back to work. This five-minute fix can save you a service call and get your soft water flowing again immediately.
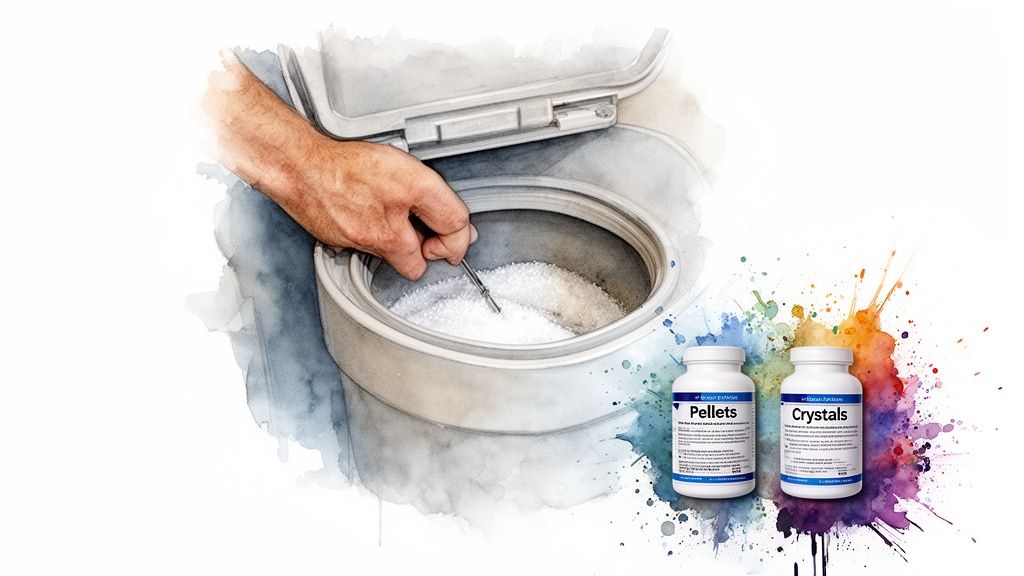
Why the Type of Salt You Use Matters
The salt you choose has a direct effect on your system’s performance and how often you’ll be dealing with issues like bridging. You’ll generally see two options at the store: pellets and crystals.
- Salt Pellets: This is what we almost always recommend. Pellets are made from compacted salt and are designed to dissolve evenly and resist clumping together.
- Salt Crystals: These are a decent alternative but are more likely to form bridges, especially in a humid climate like we have here in Los Angeles.
- Rock Salt: Just avoid it. It’s full of dirt and minerals that will turn into a thick sludge at the bottom of your tank, eventually clogging up the whole system.
Spending a little extra on high-purity salt pellets is one of the smartest investments you can make. It dramatically reduces the chance of maintenance headaches down the road. While you should always defer to your manufacturer's guide, pellets are the go-to choice for keeping a water softener running clean.
Quarterly System Health Checks You Can Do Yourself
While keeping an eye on your salt levels is a great monthly habit, your water softener needs a little more hands-on attention a few times a year. These simple quarterly tasks are designed to keep the system's core functions humming along, and the best part is they don't require any special tools—just a bit of your time.
Think of it as a quick tune-up that can prevent much bigger headaches down the road.

We'll walk through two key DIY checks: forcing a manual regeneration cycle and cleaning out the venturi valve assembly. These two tasks are surprisingly easy and incredibly effective.
Forcing a Manual Regeneration Cycle
Most modern softeners are smart enough to regenerate on their own, either based on a timer or how much water you use. So why would you ever need to do it yourself? Well, life isn't always predictable. A manual regeneration is the perfect way to reset your system after a period of unusual water usage.
For instance, if you've been on vacation for a couple of weeks, your softener has just been sitting idle. Kicking off a cycle when you get back ensures the resin bed is fresh and ready to handle your normal routine. On the flip side, if you just had family stay for a week, forcing a cycle helps the system catch up with that extra demand.
How to Start a Manual Regeneration:
- Find the "Regenerate" or "Recharge" button on your control panel.
- Press and hold it for a few seconds. You should hear the system kick on and see the display change to show the cycle has started.
- The full process can take up to two hours, and your water will be temporarily bypassed during that time. It's a good idea to do this overnight or when you know you won't need to run the dishwasher or do laundry.
This simple step ensures your softener is performing at its peak, right when you need it.
Cleaning the Venturi Valve Assembly
That might sound intimidating, but the venturi valve is a small, simple part that does a massive job. It's responsible for creating the suction that pulls the brine solution from the salt tank into the resin tank during a regeneration cycle. If it gets clogged with salt mush or sediment, the whole system grinds to a halt.
A clogged venturi is often the culprit when your water suddenly feels hard again, even though your salt tank is full. I once helped a restaurant owner in Burbank who was stumped by low water pressure and spotty dishes. It wasn't a major system failure—it was a tiny piece of debris lodged right inside this valve.
A clean venturi valve is non-negotiable. When this little part gets clogged, your softener can't create the brine it needs to clean its resin beads. It effectively turns your high-tech softener into a big, useless tank.
How to Clean the Venturi Valve:
- Put it in Bypass: First things first, engage the bypass valve on your softener. This stops water from flowing into the unit while you work.
- Relieve the Pressure: Run a manual regeneration cycle for just 10 seconds or so to release any built-up pressure, then unplug the system from the wall.
- Find and Disassemble: The venturi is usually housed under a plastic cap on the side of the main control head. Unscrew the cap and you’ll find the internal parts—a small nozzle, a throat, and a few O-rings. Lay them out on a clean towel in the order you remove them.
- Scrub and Clean: Use some warm, soapy water and a small brush (an old toothbrush is perfect for this) to gently scrub each piece. Pay close attention to the tiny holes in the nozzle and throat, making sure they're completely clear.
- Reassemble with Care: Put everything back together in the reverse order. Make sure the O-rings are seated properly—this is key to preventing leaks later.
- Get Back to Business: Disengage the bypass valve to let water flow back to the system, plug it back in, and keep an eye out for any drips around the valve cap.
Tackling this quick cleaning every three or four months can prevent the most common reason regeneration cycles fail. In fact, if you ever find your water tastes salty after installing a water softener, a malfunctioning venturi could be to blame. This step ensures your system rinses correctly, keeping that salty brine out of your home’s pipes.
Giving the Brine Tank Its Annual Deep Clean
Once a year, it's time to roll up your sleeves and give your brine tank a proper deep clean. This is, without a doubt, the single most important task on your water softener's maintenance calendar. While it might sound intimidating, it’s a surprisingly straightforward job that pays off massively in keeping your system running smoothly for years.
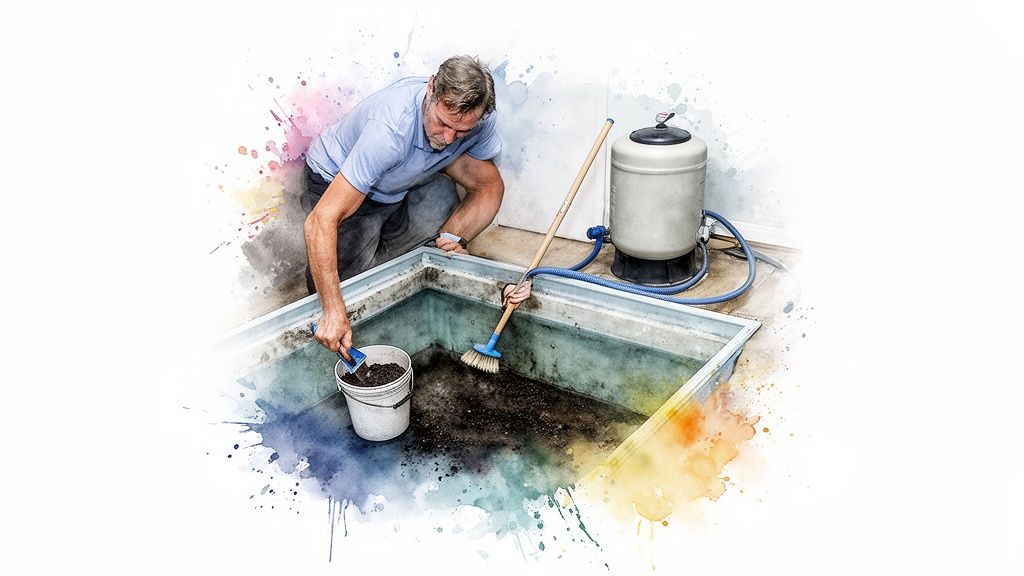
Throughout the year, all the little impurities in the salt, combined with minerals from Los Angeles' notoriously hard water, settle at the bottom of the tank. Eventually, this creates a thick, gritty sludge. This muck isn't just ugly; it's the number one enemy of your softener. It can clog the system’s injector and, even worse, foul the expensive resin beads, which is the heart of the whole operation.
Why You Can't Afford to Skip This
I once worked with a property manager in Burbank who was struggling with the performance of the water softeners across several apartment buildings. We implemented a simple annual tank cleaning protocol. The result? They added years to the life of their units and avoided thousands in premature replacement costs. The sludge we cleaned out was literally choking the systems, restricting brine flow and making them work overtime.
Ignoring this is just asking for trouble. If you've ever wondered why your dishwasher still leaves spots on your glasses even with a softener, a dirty brine tank is often the culprit. The system can't regenerate properly. In fact, unchecked sediment can slash the lifespan of your softener’s resin from a healthy 10-15 years down to less than 8 years. If you want to dive deeper, you can learn more about how maintenance impacts different systems.
A Straightforward Guide to Cleaning Your Brine Tank
The best time to tackle this is when the salt is already running low, so a little planning helps. Here's how to get it done right.
First things first, find the bypass valve on your unit and engage it. This isolates the softener, stopping water from flowing in or out while you work, preventing a giant mess.
Next, you'll need to disconnect the brine line and the overflow tube from the tank. If there’s a fair bit of water and salt left, a wet/dry shop vac is your best friend here. Scoop out any remaining salt pellets into a clean bucket; as long as they aren't too sludgy, you can reuse them.
With the tank empty, you’ll see what I’m talking about—that layer of gritty, discolored gunk at the bottom. Grab a long-handled brush and some basic dish soap and water, then give the inside a thorough scrubbing. Steer clear of harsh chemicals, as they can damage the plastic and contaminate your system down the line.
Rinse the tank out completely with a hose until the water runs clear. Once it's sparkling, reconnect the brine line and overflow tube, switch the system out of bypass mode, and pour a few gallons of fresh water into the tank to get it started.
Finally, add the clean salt you saved back into the tank, topping it off with a new bag of high-purity salt. To get everything reset and ready to go, just kick off a manual regeneration cycle. This will draw in the new water and create a fresh batch of brine.
Pro Tip: While the tank is empty, take a minute to wipe down the brine well. That's the tall, narrow tube inside the tank where the float assembly sits. Keeping it clean ensures the float can move freely and helps prevent any overfilling headaches.
Quick Component Checks While You're at It
With the tank clean, you’ve got the perfect opportunity to eyeball a few other key parts. Catching a small issue now can save you from a major repair bill later.
What to look for:
- Resin Tank Injector: This little part is vital for creating the suction needed during regeneration. Your owner’s manual can show you where it is on the control head. Pop it open and make sure its tiny nozzle and throat are clear of any debris.
- Fittings and Hoses: Do a quick visual scan of all the connections. Look for drips, mineral buildup (a sign of a slow leak), or corrosion. Make sure the brine line isn't kinked or cracked.
- O-Rings and Seals: Check the large O-rings where the main valve connects to the tanks. If they look brittle, cracked, or squashed flat, it’s a good idea to replace them. It’s a cheap fix that prevents a major leak.
This annual clean-out and inspection is the cornerstone of a healthy water softener. By investing just an hour or so once a year, you’re not only protecting your investment but also guaranteeing you’ll have great-quality soft water for years to come.
Knowing When To Call In The Pros
Even if you’re on top of your DIY maintenance routine, some water softener problems are just beyond a simple at-home fix. Being able to spot the difference between a small hiccup and a serious issue is just as important as knowing how to clean out the brine tank. Calling in an expert at the right time can save you from a minor headache turning into a massive—and costly—system failure.
While you can absolutely handle checking the salt levels and giving the tank a good cleaning, certain symptoms are clear warning signs. These are the red flags that mean it's time to put down the tools and pick up the phone.
Red Flags That Demand A Service Call
Some issues point to trouble deep inside the system's mechanics, and they’re not something you can typically solve on your own. If you run into any of these, it's a strong signal that you need a Praz Pure Water technician to take a look under the hood.
- Stubborn Error Codes: Is your control panel flashing an error that just won't go away, even after a reset? That’s your system telling you there's a deeper electrical or mechanical fault that needs a trained eye.
- A Sudden Drop in Water Pressure: If the water pressure takes a nosedive throughout your home or business, it often means the resin bed is clogged, damaged, or has even broken apart, restricting flow.
- A Regeneration Cycle That Never Ends: A softener that’s constantly regenerating is a classic sign of a bad valve, a faulty timer, or a malfunctioning sensor. It’s also wasting an incredible amount of salt and water.
For a restaurant or hotel here in Los Angeles, this kind of downtime is simply not an option. Spotty glasses or equipment caked in scale can hit your bottom line directly. In these cases, professional service isn't a luxury—it's a necessity.
What A Praz Pure Water Service Call Actually Involves
When you schedule a visit, we do a lot more than just a quick once-over. Our technicians run a full diagnostic to get to the root of the problem, ensuring every component of your softener is dialed in perfectly for LA’s unique water conditions.
Our standard service includes:
- Complete System Diagnostics: We run tests on the control valve, motors, and sensors to make sure every part is working and communicating correctly.
- Resin Health and Efficiency Test: We’ll take a close look at the resin beads. Are they still effectively grabbing those hardness minerals, or are they fouled and in need of cleaning or replacement?
- Control Valve Recalibration: Based on your current water usage and the specific mineral load in your local water, we’ll fine-tune the settings for peak efficiency.
This is the kind of detailed work that makes all the difference. While your DIY checks are fantastic for general upkeep, they can't replace an expert who lives and breathes the complex mechanics of these systems.
DIY vs. Professional Praz Pure Water Service
It can be tough to know whether to tackle a problem yourself or call for backup. This table should help you make the right call.
| Symptom or Task | Recommended DIY Action | When to Call Praz Pure Water |
|---|---|---|
| No soft water | Check salt levels; ensure no salt bridge has formed. Verify the system has power and isn't in bypass mode. | If salt is full, power is on, and you still have hard water. |
| Low salt level | Refill the brine tank with the correct type of salt pellets. | N/A – This is a standard user task. |
| Visible dirt in brine tank | Schedule time to empty and clean the brine tank thoroughly, following manufacturer instructions. | If the tank is clean but you still see debris or resin beads in your water lines. |
| Constant running/regeneration | Try a manual reset or power cycle. Check for obvious leaks around the unit. | If the system gets stuck in a cycle or regenerates far too often, wasting water and salt. |
| Error code on display | Look up the code in your user manual and attempt the suggested troubleshooting steps. | If the error code persists after a reset or points to a motor, valve, or sensor failure. |
| Sudden drop in water pressure | Check that the bypass valve is fully open. Look for any kinks in the water lines. | If the bypass is open and pressure is still low, as this could indicate a clogged resin bed. |
Ultimately, if you’ve tried the basic fixes and the problem persists, or if you simply don’t feel comfortable digging into the system’s components, that’s the perfect time to give us a ring.
The Value Of Scheduled Maintenance Plans
For any business where water quality is non-negotiable, waiting for something to break is a high-stakes gamble. Our scheduled maintenance plans are all about being proactive, allowing us to find and fix small issues before they ever cause you downtime. It’s the smartest way to protect your investment and get genuine peace of mind.
Premium water softeners can stretch service intervals to five or more years thanks to self-cleaning technology, but budget models in hard-water hotspots like Los Angeles demand checks every three to four years. Proper care ensures systems last 10-15 years, but neglect can shave off 40-60% of that lifespan, costing thousands in early replacements. Discover more insights about how proper care extends equipment life on Ecosoft.com.
With over 20 years of hands-on experience, we've found that our bi-monthly support catches an estimated 80% of issues long before they cause a full-blown failure. When you pair a well-maintained softener with the best water filtration system for a whole house, you create a comprehensive shield against water problems. In the end, knowing when to ask for help is a critical part of any smart maintenance strategy.
Got Questions? Let's Talk Water Softener Maintenance
Even with a solid checklist, questions are bound to pop up. It's completely normal. Getting to know your water softener is a process, and over the years, we've heard just about every question from our customers across Los Angeles.
We've pulled together the most common ones we get asked. Think of this as the extra insight you need to go from simply following a schedule to truly understanding your system.
How Often Should My System Regenerate Here in Los Angeles?
There’s no magic number for how often your softener should regenerate—it’s all about your specific situation. The two big factors are your local water hardness and how much water your household or business actually uses.
For a typical family of four dealing with 15 GPG hard water, you might see a modern system regenerate every 5-7 days. But that's just a baseline. A busy downtown LA restaurant or a large family that loves long showers and runs the laundry constantly could easily see their system kick on every 2-3 days.
Here's the key takeaway: your system needs to be programmed for your reality. If you see it regenerating every single day, or on the flip side, less than once a week despite heavy use, that’s a red flag. It almost certainly means your settings need a professional tweak to get your salt and water efficiency back on track.
What's the Best Salt to Use in My Water Softener?
Walking down the salt aisle can feel a little overwhelming, but it really boils down to two main players: pellets and crystals.
- Salt Pellets: We recommend pellets for about 99% of our clients. They’re made from compacted salt, which helps them dissolve evenly and dramatically cuts down on the risk of “bridging” or turning into mush at the bottom of your tank.
- Salt Crystals: These are made from evaporated salt and they work fine, but in our experience, they're more prone to causing bridging issues if the tank isn't kept in perfect shape.
Your first move should always be to check the manufacturer's guide. That said, for most modern softeners, you can't go wrong with high-purity salt pellets. They deliver the most consistent, headache-free performance. The one thing to always avoid is rock salt. It's loaded with impurities that will absolutely clog up the delicate parts of your softener over time.
Choosing the right salt isn't just about making your system run; it's preventative care. Sticking with clean, high-purity pellets is one of the simplest things you can do to protect your investment and dodge a service call for a nasty clog.
My Water Still Feels Hard Right After a Regeneration Cycle. What's Going On?
This is definitely a frustrating one, but the fix is often surprisingly simple. If your dishes are coming out spotty and your towels feel like sandpaper right after a regeneration, it's time to do a little detective work.
The first and most common culprit is a salt bridge. This is a hard crust of salt that forms across the top of the salt in your brine tank, creating a hollow space underneath. The water can't reach the salt, so no brine is made. If your tank looks full but the salt level never drops, you've likely found your problem.
No bridge? The next place to look is the venturi valve, which can get clogged with tiny debris and prevent the system from creating the brine it needs. And sometimes, the settings are simply wrong for your current water usage or a recent change in your area's water hardness. If none of these checks do the trick, it could point to a bigger issue with the control valve or the resin bed itself—and that’s the perfect time to call in a pro.
How Long Should My Water Softener Resin Last?
Think of the resin bed as the engine of your softener. Its lifespan is directly tied to how well you take care of it.
Here in a hard water area like Los Angeles, a quality resin bed that’s part of a well-maintained system should easily last 10 to 15 years. But if you neglect the system, you can burn through that resin in as little as 3 to 5 years.
You'll know the resin is starting to fail if you see signs like:
- A noticeable drop in water pressure all over the house.
- Tiny yellow or brown beads (that's the resin) showing up in your water or toilet tanks.
- The water just isn't getting soft anymore, even though the salt tank is full and the system is regenerating.
Replacing the resin is a complex job that’s really best left to a professional. A good technician won't just swap it out; they'll make sure the old, exhausted resin is disposed of correctly and get your system dialed back in for peak performance.
Ready to take the guesswork out of your water softener maintenance? The experts at Praz Pure Water, Inc. are here to help. Whether you need a professional tune-up or want to explore our proactive maintenance plans, we ensure your system runs perfectly for years to come. Visit us to schedule your service today.