A successful water softener systems installation starts long before you touch a wrench. Proper planning is the most important step to avoid future problems. This is where you test your water, size your system, and pick the perfect spot for the unit. Getting these details right ensures your investment works efficiently from day one, saving you money on salt, water, and appliance repairs.
Your Pre-Installation Game Plan
Before you buy a system or cut into your plumbing, you need a solid plan. This isn't just a suggestion—it's the foundation for your new system's efficiency and long life. Skipping this prep work often leads to an undersized unit that can't keep up or an oversized one that wastes salt and water. Both are expensive mistakes.
Recognizing the signs you need a softener is the first step. If you're constantly scrubbing stubborn hard water buildup on faucets and showerheads, you're already familiar with the problem. This buildup also damages your appliances.
This isn't a niche issue. The global demand for water softeners was valued at US$10.89 billion in 2023 and is expected to climb to US$18.62 billion by 2032. With North America making up over 45% of that market, millions of households are dealing with hard water. In places like Los Angeles, hard water can slash the lifespan of your appliances by up to 30%, making a softener a smart financial move that protects your home.
Sizing Your System Accurately
The biggest mistake homeowners make is picking a water softener based on home size. That's not how it works. A proper water softener systems installation hinges on two key numbers: your water hardness and your household's daily water use.
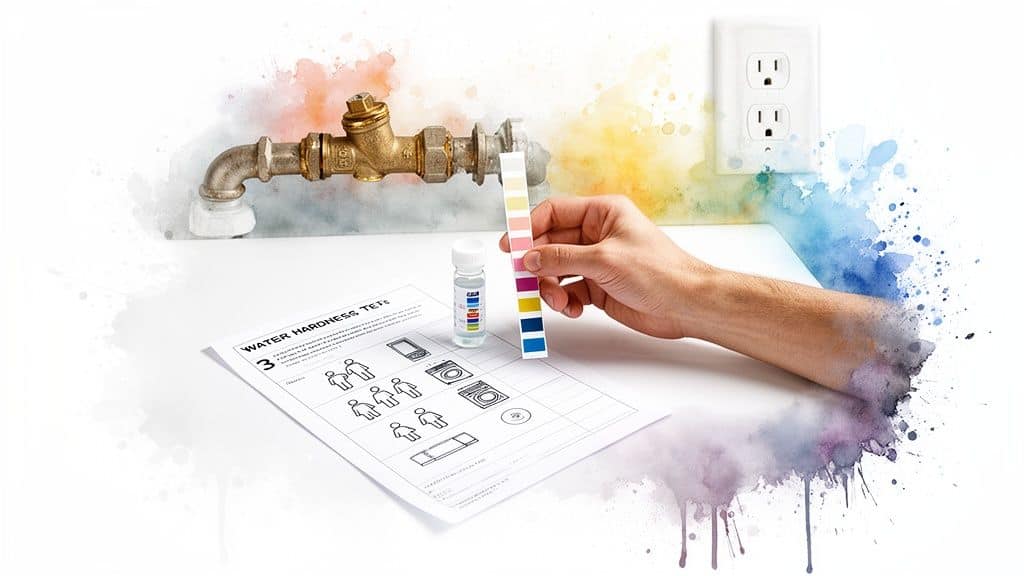
First, find your water's hardness level. Use a simple water test kit to get a measurement in Grains Per Gallon (GPG). This number tells you how hard your system needs to work.
Next, figure out your daily water usage. A good rule of thumb is 75-80 gallons of water per person, per day. Multiply that by the number of people in your home to get your total daily gallons.
Actionable Insight: How to Calculate Your Needs
- Practical Example: A family of four in a Los Angeles suburb has a water hardness of 15 GPG.
- Daily Usage: 4 people x 80 gallons/person = 320 gallons per day.
- Daily Hardness to Remove: 320 gallons x 15 GPG = 4,800 grains of hardness.
This number—4,800 grains—is your daily softening requirement. To run efficiently, you need a system with enough capacity to go several days between regeneration cycles. This prevents waste and ensures you always have soft water.
Choosing the Ideal Installation Location
Where you put the softener is just as important as which model you choose. The right spot must meet a few key criteria for easy maintenance and proper function. The system needs to be installed near the main water line where it enters your house—usually in the garage, a basement, or a utility closet.
Pro Tip: Always install your softener after the main shutoff valve but before your water heater. This is crucial because it protects your water heater from scale buildup and guarantees all hot water throughout your home is soft, extending the appliance's life.
The location also has to be:
- Near a Drain: The softener needs a place to discharge brine during its regeneration cycle. This can be a floor drain, utility sink, or standpipe.
- Close to a GFCI Outlet: The electronic control valve needs a constant, safe power source.
- On a Level Surface: The unit must be stable to prevent tipping and ensure the valve operates correctly.
Actionable Insight: Before starting, check with your local city or county office about permits. Work on your main plumbing line often requires one. A professional installer like Praz Pure Water will handle all permitting to ensure your installation is 100% compliant and up to code.
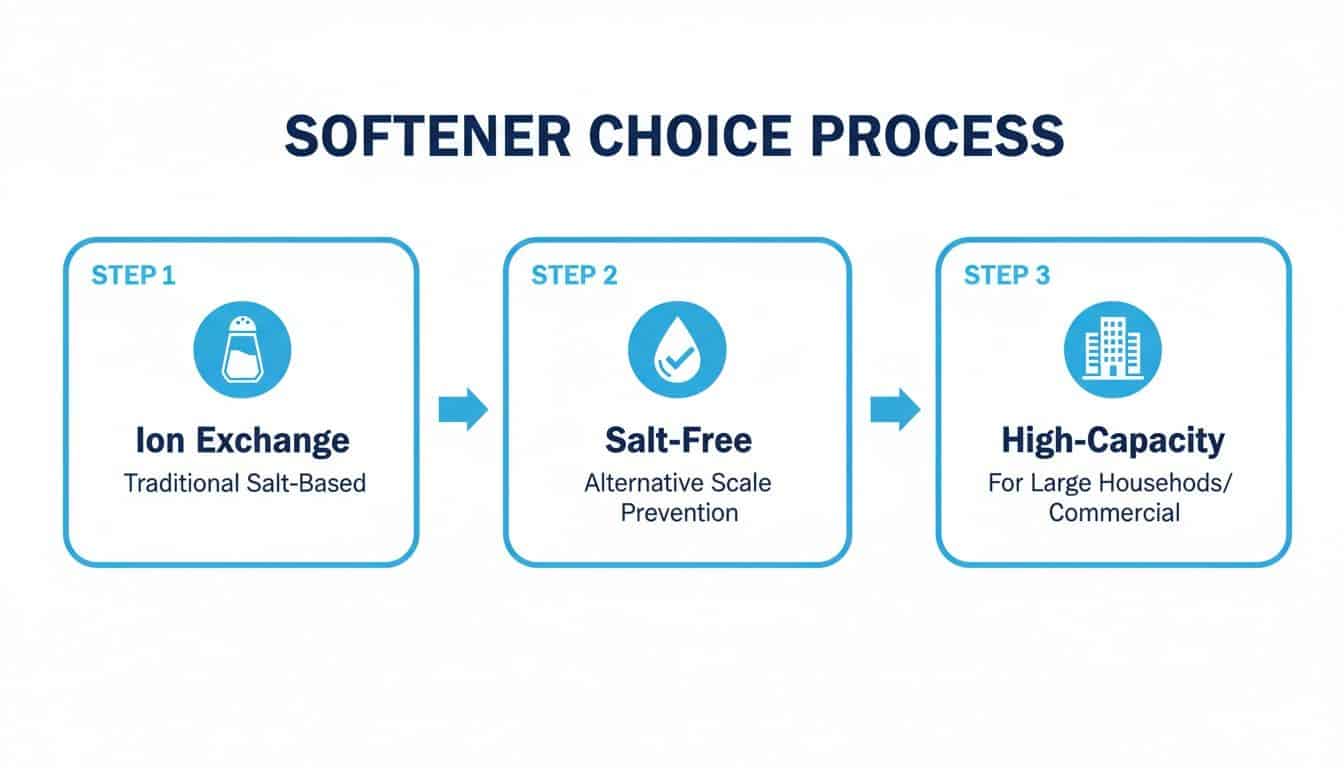
Choosing the Right Water Softener
You’ve done your homework and have the numbers on your water hardness and daily usage. Now for the important part: picking the right machine. It’s easy to get overwhelmed by the options, but a successful water softener systems installation comes down to matching the right technology to your specific needs.
The first big question is salt-based versus salt-free. In Los Angeles, where an estimated 75% of households deal with very hard water, a traditional salt-based ion exchange softener is the clear winner. These systems physically remove hard minerals—calcium and magnesium—which eliminates scale and gives you that genuinely soft water feel.
Salt-free systems, technically conditioners, work differently. They don't remove minerals but use technology to crystallize them, preventing them from building up as scale. While they are a good low-maintenance option for some, they don't deliver the same performance on very hard water, and you won't get that slick, soap-lathering feeling in the shower.
Water Softener Technology Comparison
This table offers a clear breakdown to help you choose the best system for your home, highlighting the value each type provides.
| System Type | How It Works | Best For | Pros (Value Provided) | Cons |
|---|---|---|---|---|
| Salt-Based (Ion Exchange) | Swaps calcium & magnesium ions for sodium ions, physically removing hardness minerals. | Homes and businesses in areas with moderate to very hard water. The go-to for noticeable results. | Truly soft water, prevents all scale buildup, improves soap lathering, extends appliance life. | Requires salt refills, uses water for regeneration, adds a tiny amount of sodium to water. |
| Salt-Free (Conditioner) | Uses Template Assisted Crystallization (TAC) to change the structure of minerals so they don't stick to surfaces. | Homes with slightly hard water or for those who want to reduce scale without altering water chemistry. | No salt, no wastewater, very low maintenance. | Does not "soften" water, less effective on very high hardness, won't provide the "slick" feel of soft water. |
| Dual-Tank (Salt-Based) | Two identical resin tanks operate in tandem; one is always active while the other regenerates or is on standby. | Commercial applications, large families, or any situation needing a 24/7 uninterrupted supply of soft water. | Continuous soft water with no downtime, highly efficient for high-demand scenarios. | Higher initial cost, larger physical footprint. |
Ultimately, for the kind of hard water in Southern California, a salt-based system is almost always the most effective choice for both homes and businesses.
Selecting the Right Control Head
The control head is the softener's brain, and it has a huge impact on efficiency. This is where you separate basic models from smart, cost-saving ones.
- Timer-Based Systems: These old-school models regenerate on a fixed calendar—say, every three days—no matter how much water you've used. They are cheap but incredibly wasteful, using more salt and water than necessary.
- Metered Systems (On-Demand): This is the modern standard. These units have a built-in water meter and only regenerate after a pre-set amount of water has been treated. This "on-demand" approach is highly efficient, saving you significant money on salt and water.
Actionable Insight: Don't let the slightly higher initial price of a metered system deter you. The long-term savings on salt and water provide a much faster return on investment. It's the only sensible choice for most residential projects.
Matching Capacity to Commercial and High-Demand Needs
A family home is one thing; a business is another. Think of a Glendale café with a $20,000 espresso machine or a laundromat where water quality impacts cleaning results. For them, downtime isn't an option. This is where high-capacity and twin-tank systems are essential.
- Practical Example: A twin-tank system is the gold standard for anyone who needs continuous soft water. It works with two mineral tanks. While one tank is softening your water, the other is on standby. Once the first tank is exhausted, the system seamlessly switches to the fresh one, ensuring 24/7 soft water.
There's a reason the commercial market for these systems is growing. Softened water can boost detergent efficiency by up to 50% and cut water heating energy costs by 15-30%. For a business, this isn't a perk; it's a smart operational investment.
For those wanting the best for their home or business, you can bundle systems for complete protection. We often design solutions that pair a whole house water softener system with a reverse osmosis drinking water system. This provides the ultimate value: soft water protecting your entire plumbing infrastructure and appliances, plus ultra-purified, delicious drinking water from the tap.
The Hands-On Installation Process
You’ve done the homework, tested your water, and picked the perfect system. Now, all that planning pays off. The actual water softener systems installation can feel intimidating, but it boils down to a methodical process. Whether you’re a confident DIYer or just want to follow what a pro is doing, we’ll break it down into clear, manageable steps.
With your new unit ready, it's time to hook it into your home's plumbing. The infographic below is a great refresher on the main types of systems.
This gives you a quick visual confirmation of the technology you're installing. Make sure the box in front of you matches your plan.
Prepping the Site for a Clean Install
Before touching a single pipe, take this critical step: Shut off the main water supply to your house. This is not optional—it's the only way to prevent a major flood.
Once the main is off, drain the existing lines. Open a faucet on the lowest floor (a basement sink is perfect) and another on the highest floor (an upstairs bathroom). This lets air in and allows gravity to empty the pipes.
Next, install the bypass valve. This small but essential piece attaches to the softener's control head. It lets you route water around the system for maintenance, repairs, or watering the garden with untreated water. Do not skip this step; you will be glad you have it.
Making the Right Plumbing Connections
With the bypass valve on, it’s time to connect the softener to your water lines. You'll see two primary ports—an inlet for hard water from your main supply, and an outlet that sends fresh, softened water back into your home.
How you make these connections depends on your plumbing:
- Copper Piping: The old-school standard. It involves soldering joints with a torch for a durable seal. It’s rock-solid but requires skill. A bad solder joint is a leak waiting to happen.
- PEX Tubing: Flexible plastic tubing, the go-to for modern installations. It uses crimp or compression fittings and is faster and more forgiving to work with.
- Flexible Connectors: Braided steel hoses that are the simplest option. They are a lifesaver in tight spots but don't last as long as a hard-piped solution.
Practical Example: We recently did a water softener systems installation in a classic Burbank home with a packed garage. Soldering copper in that tight corner would have been difficult and risky. Instead, we used flexible PEX to snake the lines cleanly around other equipment. It was faster, safer, and guaranteed a leak-proof connection.
Actionable Insight: No matter what material you use, always wrap threaded fittings with plumber’s tape. This tiny detail prevents slow, destructive drips that cause major headaches later.
Managing the Discharge and Overflow Lines
A salt-based softener needs to flush out the salty brine solution after it regenerates. To do this safely, run two separate lines: the drain line and the brine tank overflow.
The main drain line runs from the control head to a proper drainage point, like a utility sink. The key here is an air gap: the drain tube must end at least 1.5 inches above the drain opening. This simple gap is required by plumbing code and prevents nasty drain water from ever being siphoned back into your clean water supply.
The brine tank also needs an overflow line as a fail-safe. This tube connects near the top of the tank and runs to the same drain. If the float valve ever fails and the tank overfills, this line will prevent a salty flood on your floor.
Firing Up Your New System: Commissioning and Programming
The pipes are connected, but the job isn't done. Now comes the most important part of any water softener systems installation: commissioning. This is where we turn connected hardware into a fine-tuned machine programmed perfectly for your home.
Before you touch the digital controls, follow these physical steps to get the system ready.
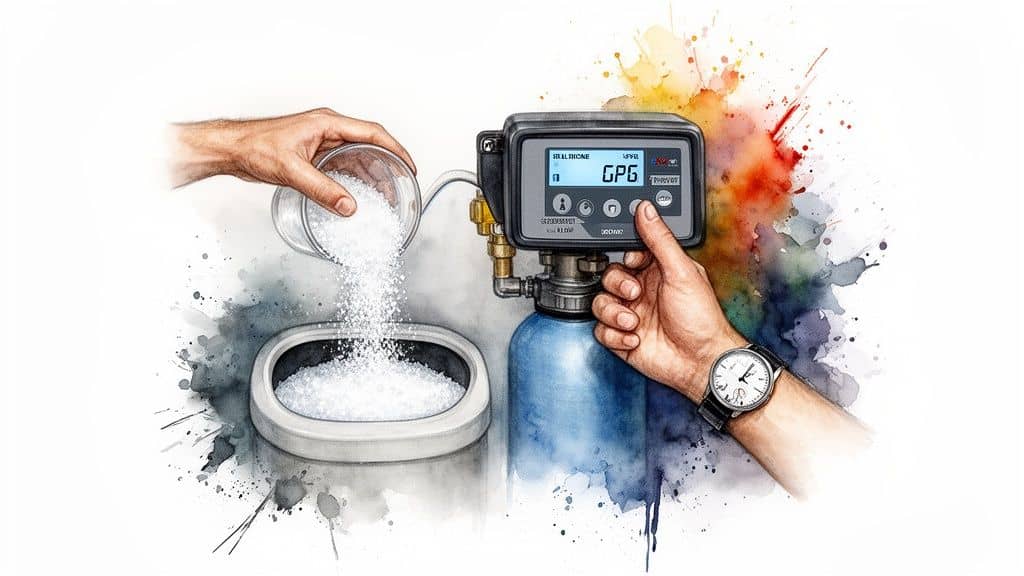
Initial System Prep
First, get the brine tank ready. Pour about 3-5 gallons of water directly into the empty tank. This creates the first batch of brine solution for the salt.
If your resin media came in a separate bag, carefully add it to the main mineral tank. Most systems today come with the resin pre-loaded, but always double-check the manual.
Now for the salt. Fill the brine tank about halfway to two-thirds full with high-quality water softener salt pellets. Avoid rock salt; it’s often full of dirt that can clog your system.
"Set it and forget it" only works if you set it right the first time. Incorrect programming is the number one reason new softeners underperform, either by wasting salt or letting hard water through.
With the tank prepped, run a manual regeneration cycle. This critical step primes the system. It flushes out factory resin dust, settles the resin bed, and pulls the first charge of brine into the mineral tank. Find the "Regen" button on the control valve, press and hold it until the cycle starts, and let it run completely. This can take up to two hours.
Programming the Control Valve for Your Home
Once the first regeneration is complete, you're ready to program the unit. You’ll need the hardness number (in GPG) from your water test. Dialing this in correctly is the key to efficiency and savings.
Actionable Insight: Programming Your Controller
- Water Hardness (GPG): Enter the exact GPG value from your test. Practical Tip: If you have iron, add 4 GPG to your hardness value for every 1 part per million (ppm) of iron to ensure proper treatment.
- Regeneration Time: Set the softener to clean itself when nobody is using water. We always set our clients' systems to 2:00 a.m. to avoid pressure drops or salty water during the day.
- Salt Dosage: Most modern valves handle this automatically. If yours allows manual changes, follow the manual's guide. Too much salt is a waste, but too little means the resin won't be fully cleaned.
Practical Example: A family in a Los Angeles home with 18 GPG hard water would have their controller programmed with "18" as the hardness value and a 2:00 a.m. regeneration time. The system then knows exactly how much water it can treat before it needs to clean itself, maximizing efficiency. On rare occasions, a malfunction can cause issues; understanding why is key. You can learn more in our guide on what to do if your water tastes salty after installing a water softener.
This final, detailed setup is what separates a DIY job from a professional one. At Praz Pure Water, we calibrate every setting to your home's unique water profile, ensuring you get peak performance from day one.
DIY vs. Hiring a Professional
You’ve picked your softener. Now, should you install it yourself or call a pro? The allure of saving money is strong, but a water softener installation involves your home’s main water supply. A small mistake can become a big, wet problem.
Let's be real about a DIY installation. It's more than hooking up hoses. You're cutting into your primary plumbing line, which requires the right tools, a solid understanding of plumbing, and a good chunk of your weekend.
What a DIY Installation Really Looks Like
If you’re leaning toward DIY, go in with your eyes open. For someone with plumbing experience, it’s a 4-8 hour job. If you’re a novice, plan for a full day.
You'll need specific equipment:
- Pipe Cutters: For clean, straight cuts on copper, PEX, or PVC.
- Soldering Torch & Solder: If you have copper pipes, you’ll be sweating joints, a skill that takes practice.
- Pipe Wrenches (2): To tighten fittings without damaging the softener's plastic control valve—a common and costly mistake.
- Drill & Bits: For running the drain line.
Practical Example: The most common DIY disaster we see is leaky fittings. A slow drip can go unnoticed for weeks, causing mold and water damage. Another frequent issue is an incorrect bypass valve setup, which stops the softener from working or sends hard water back into your "softened" lines.
The Peace of Mind a Professional Brings
When you hire a team like Praz Pure Water, you're buying a guaranteed outcome. You get an expert who has done this job hundreds of times in homes just like yours, complete with local plumbing quirks.
We often see older homes with tricky galvanized plumbing or tight spaces that require a creative, code-compliant solution. A seasoned pro knows how to navigate these challenges without the trial-and-error that can derail a DIY project.
Hiring an expert means the job is done right the first time—usually in just 2-4 hours. It’s also backed by a comprehensive warranty on both parts and labor. That’s your safety net. If anything isn't perfect, you make one call, and we fix it. No extra cost, no hassle.
DIY vs. Professional Installation Breakdown
To weigh your options, let’s break down the true costs. The DIY price looks smaller, but consider the whole picture.
| Factor | DIY Installation | Praz Pure Water Professional Installation |
|---|---|---|
| Upfront Cost | System price + tools ($150-$300) + materials. | System price + installation fee. |
| Time Commitment | 4-8 hours for an experienced DIYer; potentially more for a novice. | 2-4 hours with no time investment from you. |
| Common Risks | Leaks, improper programming, voided manufacturer warranty, code violations. | None. The work is guaranteed and fully insured. |
| Long-Term Value | Dependent on installation quality; no guarantee. | Guaranteed workmanship, system optimization for efficiency, and peace of mind with a full warranty. |
The choice is yours. If you’re a confident DIYer, installing your own water softener system can be a satisfying project.
For most homeowners, however, the speed, security, and guaranteed results of a professional installation deliver far more value and eliminate the risk of a costly mistake. It’s the difference between hoping it’s done right and knowing it is.
Answering Your Water Softener Installation Questions
When you're considering a new water softener, questions always come up. After more than 20 years installing these systems, we've heard them all. Here are honest answers to the questions we get asked most.
How Long Does It Really Take to Install a Water Softener?
This depends on who’s doing the work. For a seasoned pro at Praz Pure Water, a standard installation is a 2 to 4-hour job. This covers everything from prep to programming.
If you're planning a DIY installation, set aside 4 to 8 hours. This provides a cushion for surprises, like tricky plumbing or an extra run to the hardware store.
Where’s the Best Spot for the System?
Your softener will last longest indoors on a flat, dry surface, away from freezing temperatures and direct sunlight. For most homes, this means the garage, a basement, or a utility closet.
Actionable Insight: The key is putting it close to the essentials. You need to install it:
- Near your main water shutoff valve.
- With access to a drain for the regeneration cycle.
- Within 10 feet of a GFCI-protected electrical outlet.
A Pro's Take: We sometimes get asked about outdoor installations. While possible in a climate like Los Angeles, we strongly advise against it. Sun and humidity will damage the electronics and plastic, shortening the system's lifespan. If you have no indoor space, a proper, weatherproof enclosure is a must.
Will a Water Softener Hurt My Water Pressure?
When sized and installed correctly, a softener should cause no drop in water pressure. Strong, consistent pressure is a sign of a job done right.
If you see a pressure drop, it's a red flag. The most common cause is an undersized system that can't keep up with your home's water demand. The other frequent mistake is an installation error, like using pipe fittings that are too small and create a bottleneck. This is why professional sizing is so important.
Do I Need a Permit to Install a Water Softener in Los Angeles?
Yes, in most cases. A softener installation involves cutting into your home's main water line, and most municipalities in Los Angeles County require a plumbing permit for that work. It’s a safety measure to ensure everything is done to code.
A qualified local installer knows your area's codes and will handle the entire permitting process for you. It’s the best way to ensure your installation is compliant and avoid potential fines.
Ready to put an end to hard water problems for good? At Praz Pure Water, Inc., we specialize in expert water softener systems installation tailored to your home or business. Learn more and schedule your free water assessment today.