Installing a whole house water filter is more than just a plumbing job—it's a fundamental upgrade that protects your home's entire circulatory system. By connecting directly to your main water line, it ensures that every drop of water entering your home, from the kitchen sink to the shower, is clean, pure, and free from damaging contaminants like chlorine and sediment.
This single project can elevate your daily life by improving taste, protecting appliances, and giving you healthier skin and hair.
Why a Whole House Water Filter Is a Game Changer
Think about the little annoyances many of us in the Los Angeles area just accept as normal. Glassware coming out of the dishwasher covered in cloudy spots. That tight, itchy feeling on your skin after a shower, courtesy of chlorine. The constant battle against scale buildup in your coffee maker and kettle.
That’s the reality for a lot of homes. It's a low-grade, persistent frustration that adds up. You spend more on descaling products, you rely on bottled water for drinking, and your appliances work harder than they should.
Now, imagine flipping that script. A whole house water filter installation completely changes the picture. It’s not just about fixing a problem; it’s an investment in your home’s value, your family’s well-being, and your own peace of mind. Suddenly, your glasses are crystal clear, your laundry is softer, and you have great-tasting, refreshing water from every single tap.
From Annoyance to Asset
The value of clean water goes far deeper than just taste and appearance. When you remove harsh minerals and chemicals right where the water enters your home, the filter becomes a silent guardian for your entire infrastructure.
- Protect Your Appliances: Hard water scale is one of the biggest culprits behind inefficiency and premature failure in water heaters, washing machines, and dishwashers. For example, a water heater can lose up to 30% of its efficiency from scale buildup. Filtered water stops that buildup cold, helping your appliances run better and last years longer.
- Preserve Your Plumbing: Those same minerals that damage your appliances can clog and corrode your pipes from the inside out. A whole house filter protects your plumbing network, helping you avoid costly and disruptive repairs down the road.
- Boost Your Health and Wellness: Cutting down on chlorine and other chemicals means you’re not drinking, cooking with, or showering in them. Many of our customers tell us they notice a huge difference in skin and hair dryness once their water is filtered. If you're curious about the science behind it, check out our deep dive into how water filtration works.

A Growing Trend in Home Improvement
We're not the only ones who see the value. More and more homeowners are recognizing the benefits of taking control of their water quality, and the market reflects that.
The global market for home water filtration was valued at USD 20.26 billion and is expected to surge to USD 50.89 billion by 2033. That’s a powerful sign that people are becoming much more aware of what’s in their water.
This trend firmly places a whole house filter in the category of a modern home essential. It makes sense, too. Homeowners are increasingly looking for ways to create healthier living spaces, often pairing water filtration with systems like whole home air purifiers.
Choosing a Praz Pure Water system isn’t just about getting cleaner water; it’s a decisive step toward creating a home that is healthier, runs more efficiently, and is simply more enjoyable to live in.
Planning Your Installation for a Perfect Fit
When it comes to installing a whole house water filter, the single biggest mistake people make is rushing the planning stage. A successful installation is 90% planning and 10% plumbing. Get the planning right, and the rest falls into place. Skip it, and you could end up with a system that's too big, too small, or just plain wrong for your water.
Think of this as your pre-flight checklist. Taking a little time now to gather the right information will prevent major headaches later, like a sudden drop in water pressure or realizing your new filter doesn't even touch the main contaminant in your water. Let's walk through what you need to know.
Understand What’s in Your Water
First things first: you have to play detective. You can't fix a problem if you don't know what it is. Every home's water has a unique fingerprint of minerals, chemicals, and other contaminants that will determine the kind of filtration you actually need.
A home with well water in a rural area, for example, might be fighting high levels of sediment and iron. Someone living in Los Angeles on city water is more likely dealing with chlorine, chloramines, and hard water minerals. These are completely different problems requiring very different solutions.
Actionable Insight: Get a copy of your city's annual Water Quality Report (also called a Consumer Confidence Report). It's a great starting point and lists the contaminants they've tested for. For the most accurate picture—and this is a must for well water—nothing beats a professional test. This data tells us exactly what we're up against and lets us recommend the perfect system with confidence.
Determine Your Household’s Peak Water Demand
Once you know what you need to filter out, you have to figure out how much water your home uses at its busiest moments. We measure this in gallons per minute (GPM), or flow rate. Choosing a system with a GPM rating that’s too low is a recipe for frustration. It creates a bottleneck in your plumbing, and you’ll feel it as weak water pressure.
Just imagine a typical busy morning. Someone's in the shower (2.5 GPM), the dishwasher's running (2 GPM), and the washing machine is filling up (2.5 GPM). That's a combined demand of 7 GPM. If your filter is only rated for 5 GPM, it simply can't keep up.
Actionable Insight: Take a minute to add up the flow rates of the fixtures and appliances that might all be running at once in your home. It’s a simple bit of math that is absolutely crucial for sizing your system correctly. The goal is for your new filter to improve your water without you even noticing it's there.
Finding the right system is all about balancing its filtration power with your home's flow rate needs. If you want to see how different types of systems perform, check out our water filtration systems comparison guide for a detailed breakdown.
Your Essential Pre-Installation Checklist
To make this planning phase as simple as possible, here is a checklist of actionable steps. Run through these to gather the essential info before you buy anything. Having these answers ready will make the entire process, from purchase to installation, go off without a hitch.
| Assessment Step | What to Do | Why It's Important |
|---|---|---|
| Water Quality Analysis | Obtain your local water report or schedule a professional water test with us. | Identifies specific contaminants like chlorine, sediment, or heavy metals, ensuring you choose a filter that targets your actual problems. |
| Flow Rate Calculation | List your water-using appliances and their GPM ratings. Add up the total for a peak demand estimate. | Prevents buying an undersized system that would cause frustrating water pressure drops during peak usage times. |
| Pipe Size & Type | Identify the diameter (usually ¾" or 1") and material (copper, PEX, PVC) of your main water line. | Ensures you purchase a filter and fittings that are compatible with your existing plumbing, avoiding surprise trips to the hardware store. |
| Installation Space | Measure the physical space where the filter will be installed (garage, basement, crawl space). | Confirms the system you want will actually fit and leaves enough room for future access to change filters easily. |
Getting these details sorted out upfront is the key to a smooth, successful installation that you'll be happy with for years to come.
Getting Your Hands Dirty: Tools, Materials, and Finding the Right Spot
Alright, you’ve done your homework and picked out the perfect system. Now comes the fun part: making it a reality. This is where the planning pays off, and getting your tools and location sorted out first will make the actual installation go incredibly smoothly.
Think of this as setting the stage. A little prep work here saves a ton of headaches later. We'll walk through the tools you absolutely need, the best piping for the job, and how to pinpoint the perfect home for your new filter system.
Your Must-Have Tool and Materials List
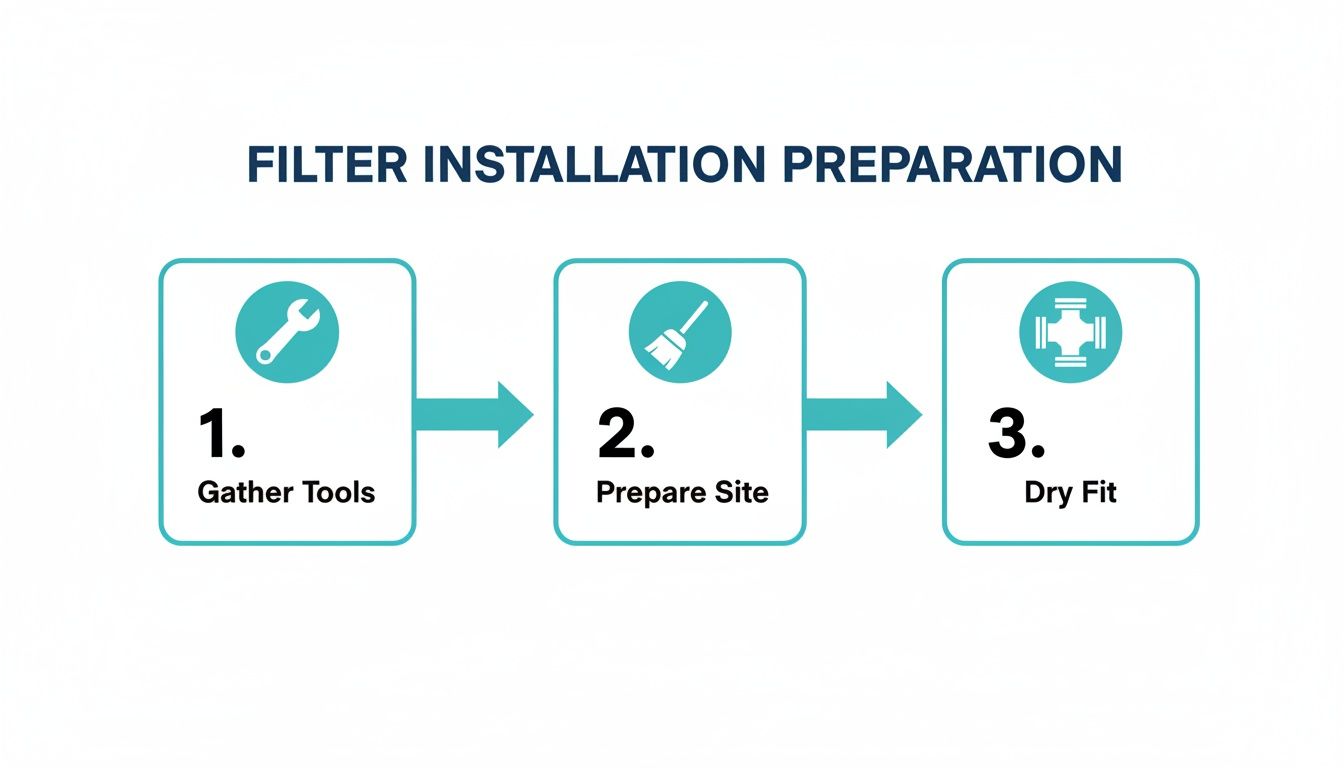
Before you even think about shutting off the water, get everything you need in one place. Trust me, nothing kills momentum like an unexpected mid-project trip to the hardware store. While your specific setup might need a few extras, this is the core arsenal you'll want ready to go.
- Pipe Cutters: The right cutter for your pipe type is non-negotiable. If you have copper pipes, a tubing cutter is essential for a clean, square cut—that’s the secret to a joint that won’t leak. For PEX or PVC, you'll need a cutter designed for plastic to avoid crushing or mangling the pipe. Please, don't use a hacksaw; the burrs and uneven edge it leaves are a recipe for disaster.
- Wrenches: A couple of good adjustable wrenches and a solid pipe wrench will handle most of the tightening you’ll be doing on fittings and housings.
- Safety Gear: This isn't optional. Get a good pair of safety glasses to protect your eyes from flying debris and a pair of gloves to save your knuckles.
- Measuring & Marking: A simple tape measure and a permanent marker are your best friends for making sure every cut is precise and every component lines up perfectly.
Practical Example: Always do a 'dry fit.' Before a single pipe is cut, lay everything out on the floor—the filter unit, the valves, the fittings—exactly as they'll go on the wall. You’d be amazed how often this simple visual check catches a fitting pointed the wrong way or a measurement that’s slightly off. It’s a five-minute step that can save you hours of frustration.
Choosing Your Pipe: PEX vs. Copper
You'll most likely be working with either PEX (a flexible plastic tubing) or traditional rigid copper. They both get the job done, but one is often a much better choice depending on where you're working.
- PEX Tubing: This is a lifesaver, especially in tight or awkward spaces. Because it's flexible, you can bend it around corners and obstacles, which means you'll use fewer fittings. Fewer fittings always means fewer potential spots for a leak to develop. It's also incredibly forgiving for first-timers.
- Rigid Copper: There's a reason it's been the standard for decades. Copper is tough, reliable, and looks clean and professional, especially for installations in open areas like a basement or garage where it’s exposed.
Imagine you're installing the system in a cramped crawl space. PEX is your hero here, letting you snake the lines where you need them without a fuss. But if you're putting it on a garage wall, the neat, straight lines of a copper installation can't be beaten for a professional look.
Finding the Perfect Installation Spot
Where you put your filter system matters. It affects not just the installation itself, but every filter change for years to come. The ideal spot is as close as possible to where your main water line enters the house, right after the water meter and main shutoff valve. This way, you’re filtering 100% of the water from the get-go.
Let’s look at a couple of common real-world locations.
Scenario 1: The Open Garage
This is usually the dream scenario. You've got space to work, solid walls for mounting, and decent light. Actionable Insight: Don't stick it where it's going to get in the way of your car door or block access to storage. Most importantly, you must leave at least a foot of clear space below the filter housings. You'll need every inch of that clearance to unscrew the canisters when it's time to swap out the filters.
Scenario 2: The Cramped Crawl Space
This is a bit more of a challenge, but totally doable if you think ahead. The number one rule here is accessibility. Don't tuck the unit into a far-off corner that you have to belly-crawl to reach. Install it right near the access hatch. Also, make sure the ground beneath it is level and solid, and that you have enough elbow room to get a wrench on the fittings. You will thank yourself profusely when that first maintenance reminder pops up.
Alright, you’ve got your tools and you’ve picked the perfect spot. Now for the main event: getting that whole house water filter installed and running. Don't let this part intimidate you. We'll walk through it logically, from shutting down the water to making the final connections, and I'll share some pro tips I've learned along the way.
It’s no surprise you’re tackling this project—more homeowners than ever are focused on improving their water quality. The demand is pushing the global water purification market, valued at a massive USD 48.1 billion, toward a projected USD 97 billion by 2035. That's a clear sign that people are investing in cleaner, safer water at home. If you're curious, you can explore more data on the global water purifier market to see just how big this trend is.
Let's get our hands dirty.
This visual guide lays out the essential prep work. Getting this right before you cut a single pipe is the secret to a smooth, mistake-free installation.
Shutting Off and Draining Your Water Main
First thing's first: you absolutely have to shut off the water to the entire house. Find your main shutoff valve, which is usually tucked away in a basement, garage, or utility closet right where the water line comes in from the street.
Turn the handle clockwise all the way until it stops. Now, to make sure it's really off and to drain the pipes, open a faucet on the lowest level of your home (like a spigot outside or a basement sink). After that, head upstairs and open a faucet on the highest floor. This creates an air gap and lets gravity do the work of draining the system. It's a simple trick that prevents a huge, watery mess when you make that first cut.
Practical Example: I've seen it a hundred times—someone gets impatient and doesn't fully drain the lines. Even a little bit of water left in the pipes can spray everywhere, making it impossible to get a clean, dry connection for soldering or sealing threads. That extra five minutes is well worth it.
Making Clean Cuts and Installing Fittings
Now you’re ready to cut into your main water line. Precision is your best friend here, as a clean, square cut is non-negotiable for a leak-proof seal.
- For Copper Pipes: A tubing cutter is the only tool for the job. You just clamp it on, give it a little twist and tighten, and repeat until it pops right through. It leaves a perfectly smooth edge every time.
- For PEX or PVC: Grab a ratcheting plastic pipe cutter. It slices through cleanly without squeezing or deforming the pipe, which is critical for getting a proper seal with your fittings.
Once the cut is made, take a deburring tool or a small piece of sandpaper and clean up the inside and outside edges of the pipe. This little step is often skipped, but it's crucial. Tiny burrs can shred the O-rings in your fittings and cause those slow, annoying drips that drive you crazy later.
With the pipe prepped, you can install the shutoff fittings on either side of the gap you've created. Whether you're using modern push-to-connects, classic compression fittings, or sweating copper, make sure they are seated all the way and tightened exactly as the manufacturer recommends. This is where you'll be glad you did a dry fit earlier.
Connecting Your Bypass Loop
If you want to do this installation like a pro, you have to include a bypass loop. This is just a simple setup with three valves: one on the pipe going into the filter, one on the pipe coming out, and a third valve on a short pipe connecting the two.
Why is this a game-changer?
Fast forward six months. It's time to change the filter cartridge. With a bypass loop, the job is a breeze:
- Close the inlet and outlet valves to isolate the filter.
- Open the bypass valve.
That's it. Your house still has running water while you take your time swapping out the filter. No one's yelling for you to hurry up because they need to take a shower.
Without a bypass, you’d have to shut off the water to the whole house every single time you do maintenance. Practical Example: We once had a client with four kids call their bypass loop a "lifesaver" because it meant filter changes no longer threw their morning routine into chaos. That’s the kind of practical, forward-thinking installation we believe in at Praz Pure Water.
With your valves in place, go ahead and mount the filter unit to the wall, making sure it’s level and secure enough to hold the weight when it's full of water. Then, simply connect your pipes to the "in" and "out" ports on the filter head—just be sure to follow the flow direction arrows
Bringing Your System Online and Handling Common Issues
You’ve tightened the last fitting and the unit is mounted securely. Nice work. The heavy lifting is done, but don't rush this final step. The system startup is where you carefully bring your new whole house water filter online and iron out any minor kinks.
A slow, deliberate startup is your best defense against problems like water hammer—that startling banging sound in your pipes caused by a sudden pressure surge. It also ensures your filter media is properly rinsed and ready to go.
The Right Way to Start Up
I’ve seen plenty of people rush this part, and it almost always leads to trouble. The trick is to reintroduce water slowly and in the right order.
First, make sure the outlet valve on your filter system is closed. Your inlet and bypass valves should be open. Now, head to the main water shutoff for the house and crack it open just a quarter turn. You’ll hear the pipes start to fill. Give it a minute, then slowly open the main valve all the way.
Actionable Insight: Next, you must flush the new filters. This is especially important for carbon filters, which are full of loose particles, or "fines." Direct water through the filter but divert it out a nearby hose bib or drain for a good five to ten minutes. Keep going until the water runs perfectly clear. Skipping this means all that black carbon dust ends up in your home's pipes and faucet screens.
Once the water is clear, you can close the bypass valve and slowly open the outlet valve. This will pressurize the rest of your home's plumbing. And just like that, your system is officially online.
Troubleshooting Common Installation Hiccups
Even the most careful installation can have a small issue or two pop up. Don't worry. Here’s how to handle the most common ones I see in the field.
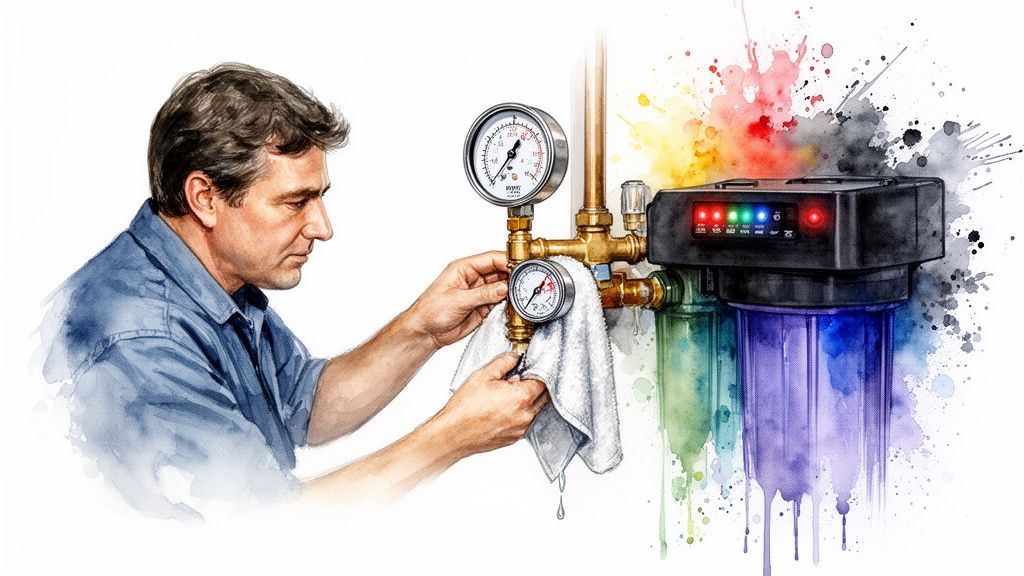
My Water Pressure Dropped!
This is easily the #1 concern I hear after a new install. A significant pressure drop usually points to a simple fix.
- What's Happening: Most often, air is trapped in the filter housing. It could also be that the filter cartridge isn't seated quite right. Sometimes, sediment knocked loose during the install has simply clogged the aerators on your faucets.
- How to Fix It: Start by pressing the red pressure relief button on top of the filter housing to bleed off any trapped air. If pressure is still low, shut the water off, open a faucet to relieve pressure, and unscrew the filter housing. Pull the cartridge out and pop it back in, making sure it seats firmly. Lastly, walk around to your sinks and unscrew the aerators to clean out any grit.
I've Got a Slow Drip at a Fitting.
You've checked everything, but there's a tiny, nagging drip coming from one of your connections.
- What's Happening: This is almost always an issue with the seal. Either you didn't use enough Teflon tape, or you didn't wrap it in the right direction.
- How to Fix It: Resist the urge to just crank down on the fitting with a wrench—that's a great way to crack it. The right move is to shut the water off, completely undo the connection, and re-apply a fresh layer of Teflon tape. I recommend at least three to four wraps, pulled taut, in the same direction the fitting will turn (clockwise). Re-tighten it snugly, and your drip should be gone for good.
"A flawless installation is one that's followed by a flawless startup. Taking your time to slowly re-pressurize and thoroughly check every connection is what separates a DIY job from a professional one. It’s the last 10% of the project that ensures the first 90% was worth it."
To keep your filter running like new for years, you’ll need a solid maintenance routine. You can easily map this out with a preventive maintenance schedule template, which helps you keep track of filter changes and system checkups.
By following these startup and troubleshooting steps, you can wrap up your installation with confidence, knowing your system is ready to perform from day one.
Got Questions? We've Got Answers.
Once your new whole house water filter is up and running, it's pretty normal to have a few questions pop up. It’s a big investment in your home's health, and you want to be sure you understand how it all works. Here are some of the most common things we get asked by homeowners just like you.
How Much Does Professional Installation Typically Cost?
This is usually the first thing on everyone's mind, and the honest answer is: it depends. The biggest factors are the type of filter system you choose and what your current plumbing setup looks like. For a professional job, you can generally expect the labor to run anywhere from a few hundred to over a thousand dollars.
At Praz Pure Water, we don't do guesswork. We provide a detailed, upfront quote after we’ve actually seen your space. That price isn’t just for turning wrenches; it’s for the confidence that comes with knowing the job is done to code, done right the first time, and backed by our guarantee. The principles are similar across different systems, and you can get a better feel for the details by reading about the factors that influence reverse osmosis system installation cost.
Do I Really Need a Permit for This?
More often than not, yes. In many parts of Los Angeles, if you’re cutting into your main water line, you're going to need a permit. This isn't just bureaucracy—it's a safeguard to ensure the work is done correctly and won’t create a hazard down the road.
Value Insight: Trying to figure out local codes can be a real pain, and that's one of the best reasons to hire a pro. We take care of all the permitting as part of our installation service. You won't have to worry about a thing; we ensure your new system is 100% compliant from day one, providing you with total peace of mind.
How Often Will I Need to Change the Filters?
This comes down to a simple trade-off between the kind of filter you have and how dirty your incoming water is.
- The sediment pre-filters, which catch all the big stuff like sand and rust, usually need to be swapped out every 3-6 months.
- The big carbon block filters that tackle chemicals and taste can often go for a full year, sometimes even longer.
We design our systems so that maintenance is straightforward, but for those who'd rather not think about it, we offer service plans. Our team just shows up on schedule and handles the filter changes for you. It's the ultimate set-it-and-forget-it solution for perfect water.
Actionable Insight: Pay attention to your filter's performance during that first year. You might notice the sediment filter clogs up a bit faster after a heavy rain, or that your carbon filter is still going strong at the 12-month mark. Your own experience is the best guide for creating a maintenance schedule that’s perfect for your home.
Can I Install a Filter if I Already Have a Water Softener?
Absolutely. In fact, they’re the perfect combination for truly exceptional water quality. Think of them as a team—each has a different, specialized job.
The best way to set them up is to have the whole house filter installed before the water softener. The filter strips out chlorine and sediment, which can actually damage the expensive resin beads inside your softener. This protects your softener investment and lets it focus on what it does best: removing the hardness minerals that cause scale buildup. The result? Clean, soft, and fantastic-tasting water from every tap in your house.
Ready to stop wondering and start enjoying pure, clean water? The experts at Praz Pure Water are here to design and install the perfect system for your Los Angeles home. Contact us today for a free consultation!